

Low Budget Skeg Repair
- Dave LeGear
- Apr 15, 2023
- 4 min read
Updated: Mar 27
Fishing in shallow water can and does take its toll on your engine skeg. Though the skeg is designed to be a replaceable device, not everybody has access to the welding equipment needed to do such, nor do they want to have the boat in the shop long enough to have one replaced.
As you can see from the first picture, mine has found the bottom more than once and more than likely while scouting around Oyster beds looking for Redfish. 😉

So, having a few divots in the skeg is not a (as most would first think) real big deal and is designed to be like the “virgin” that you pitch into the volcano to shut it up and get sacrificed, much like your other engine zincs do... It can, though, impact engine performance and fuel economy that most may not first realize. As the boat gets up on a plane and moves at cruise speeds and higher, those chunks create air bubbles that go over the prop and allow one to slip.

We came up with a “Low Budget Skeg Repair" if you have the tools to knock the job out quickly and just need a power sander and some 220 paper (complete list below) to make this job reasonably quick.
So, use the sander to sand down the rough spots without making them deeper. What I am looking to do is smooth out and level the contours of the skeg as best as I can, without this becoming a major automotive body style of repair. We have to remember that the next trip out, it will start taking a beating again, so making one look like new and all the hours needed in doing so could be just a waste of time and materials.
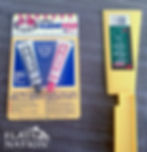
The next step was to pick up some Marine Grade (so it will hold up to Salt Water) JB Weld and something to apply it with that I was able to secure at the local auto parts store for around 15 dollars, but you can also read more about it and order online by clicking Here.
Then, after using some leftover Throttle body or another quick-to-flash-off type of cleaner and a rag to get all the sanding dust and oils off the now-sanded skeg. Then mix up some JB Weld and apply it as a skim coat (like using Bondo on your older Truck fenders of years gone by) to help fill in the chunks taken out of it.

Now, it still looks rough, and next time, I figure I will use an old credit card or another thinner plastic device to apply the JB Weld with, but even with it not sanded in this state, it filled in the majority of those chunks and was much smoother than before.

I then (as recommended) let it set up overnight to ensure it cured as best as possible before returning the next day to sand it as smoothly as possible using 220 grit (it only took a few minutes with my electric Random Orbiter sander) to smooth it all back out.
I then cleaned it well with a semi-stiff paintbrush to remove all the dust collected in the craters. I then used some more Throttle Body Cleaner on a clean rag so the paint would have a clean surface to stick to.
So here are the results after hitting it with some OEM engine color-matching paint (or you could use what you have already on hand / in the color of your choice) for more visual pop or sight improvement in murky waters if desired. This from the rattle can spray on type of paint.

It's actually pretty exciting! Remember, we're not dealing with a fender on an old Porsche here. We're working on strengthening the skeg and, even more importantly, enhancing the water flow over the skeg to the prop. This means it will grip the water better and reduce slippage. On your next adventure, it might get a few new battle scars, but now you've got an affordable and speedy way to fix it up again. This will help keep your pride and joy looking fantastic!
Something to consider adding to your clean-up checklist if you have her up for sale! 😀
Materials List:
Power Sander of choice and a drill might even work, just not as efficiently as I have found.
220 Sandpaper (and I only needed one stick on the pad)
Some old cardboard scrap to mix up the JB Weld upon.
Something you can pitch to mix up the JB Weld with. I ate a Pop Sickle so I could use the stick 😋
Some cleaners that will flash off quickly, like Throttle Body or other Metal surface cleaners, remove any oils you spray on to clean up the metal surfaces before painting.
A couple of clean rags
In the meantime,
We invite you to take in a few Flats Nation Podcast Episodes to help "Scratch that Fishing Itch" when working or traveling and you cannot hitch up the Skiff and go by clicking Here: and do share with your family and friends!
Also, check out the "Flats Nation" Merch and Swag collection! if you enjoy our content help support the effort and Rep "The Nation" at the same time! We have some newer works, from T-shirts to our newer Technical wear, all which can be found by clicking Here.

Tight Lines, and God Bless!
Dave and the Team

